
Science doesn’t have to be all serious lab coats and complicated theories. There are plenty of fun and exciting science experiments for children that will spark their curiosity and teach them some cool science at the same time.
From making slime to growing salt crystals, these simple yet fascinating experiments are great ways to engage kids in hands-on learning. The best part? They require minimal supplies – you probably have everything you need already – and are safe to try at home, with proper parental supervision.
Here are five fun science experiments that children will love, and they might even learn a thing or two in the process.
In this post:
Key Takeaways
Children will be able to observe real chemical and physical reactions using easily set up experiments with common household items
Each activity can be done in under an hour, making them perfect for quick science lessons or weekend projects
The experiments cover a range of science topics, from physics to biology and chemistry
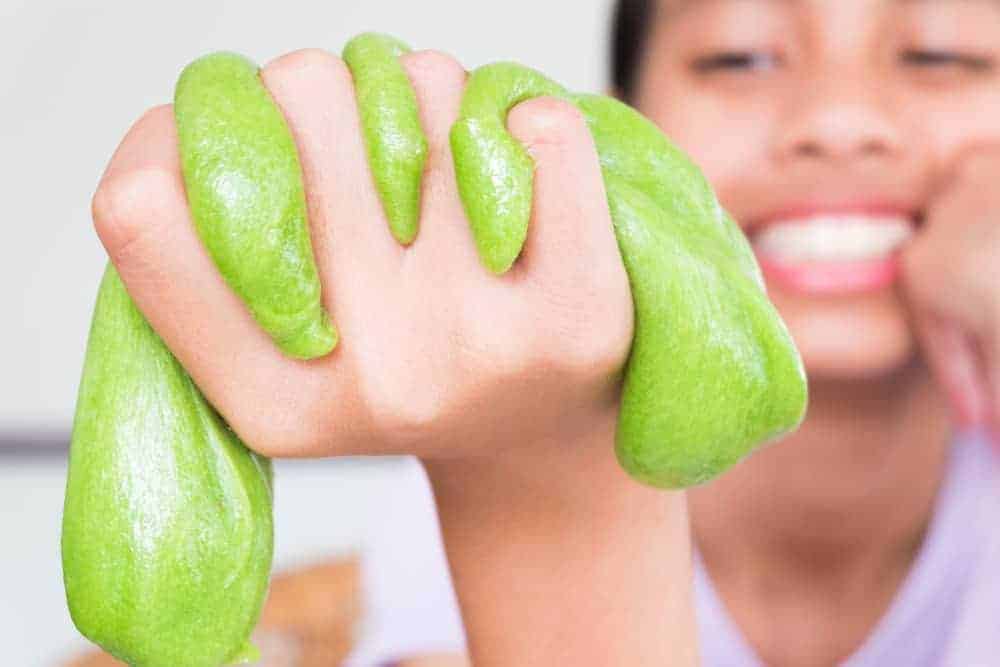
1. Making Slime
Slime has taken over as a favourite activity for kids. Beyond its viral popularity, it’s fun, squishy, and easy to make, as well as being a brilliant sensory toy. On top of that, it’s also a great opportunity for children to explore basic chemical reactions and materials science.
The best part? You can customise it with different colours, textures, and glitter, making it a perfect experiment for kids of all ages.
How to Do It
To make slime, you’ll need the following ingredients:
- White school glue (around 100ml)
- Baking soda (1 teaspoon)
- Contact lens solution – one with boric acid (around 1 tablespoon)
- Optional: food colouring or glitter for extra colour and sparkle
First, pour the glue into a bowl and add the baking soda. Stir until it’s well combined. Then, slowly add the contact lens solution while continuing to mix. The mixture should thicken as you stir.
If needed, you can adjust the consistency by adding more contact lens solution. Once it starts to pull away from the bowl and forms a sticky, stretchy texture, it’s ready to play with.
How It Works
This experiment involves a simple chemical reaction. When you mix the glue with the baking soda, you are preparing the polymers in the glue.
The boric acid and sodium borate in the contact lens solution help link the polymer molecules together. This then turns the mixture into a stretchy, gooey substance. The reaction that occurs results in the slime’s unique texture and elasticity.
Children will also learn about non-Newtonian fluids during this experiment, as slime is a type of fluid that behaves differently from what we expect, and it can act like a solid or a liquid depending on how it’s handled.
2. Elephant Toothpaste
This experiment is sure to impress! It’s a thrilling reaction that produces a foamy explosion that looks like a giant stream of toothpaste. Kids will love the dramatic effect, and it’s a great way to teach them about catalysts, chemical reactions, and the power of oxygen.
How to Do It
Most importantly, conduct this experiment outside! To create the “elephant toothpaste” effect, you’ll need:
- Hydrogen peroxide (6% solution works best)
- Potassium iodide solution or liquid dish soap (as a substitute)
- Food colouring (optional)
- A plastic bottle or container
Start by pouring hydrogen peroxide into the bottle, filling it about halfway. Add a few drops of food colouring if you want to make it more visually striking. Then, carefully add the potassium iodide solution or dish soap. When you’re ready, give it a quick swirl. The reaction will begin, and foam will overflow out of the bottle.
How It Works
The magic behind elephant toothpaste is a rapid decomposition of hydrogen peroxide. The hydrogen peroxide molecules decompose into water and oxygen gas, releasing heat in an exothermic process.
When the potassium iodide or dish soap is added, it acts as a catalyst, speeding up the reaction. The soap catches the oxygen bubbles, creating foam. This is an exciting example of how catalysts can affect the rate of chemical reactions.
You’ll also see a large volume of foam being produced very quickly, which is a good way to demonstrate the concept of gas expansion.
3. Invisible Ink
This experiment lets kids feel like spies or secret agents! By using everyday materials, children can learn how acids and heat work together to reveal hidden messages. It’s a fun activity that also teaches a bit about chemistry and the effects of temperature.
How to Do It
For invisible ink, you’ll need:
- Baking soda or lemon juice mixed with water
- A cotton bud
- Paper
- A lamp or iron for revealing the message
To start, dip the cotton bud into the lemon juice or the baking soda mixture. Write a message on a piece of paper using the cotton bud, being careful to keep the writing light so it’s truly invisible when it dries.
When the ink is dry, you can read the hidden message by heating the paper with a lamp or an iron set to low – make sure you apply a gentle heat. This will cause the invisible ink to appear, revealing the words.
How It Works
Lemon juice contains citric acid, and when it’s applied to paper, it reacts with the paper’s fibres. As the paper is heated, the acid in the lemon juice breaks down the paper in those areas, causing the writing to turn brown. With baking soda, the reaction is slightly different but produces a similar effect when heated.
This experiment demonstrates how acids and heat can cause chemical changes in materials, and it shows children the fascinating world of chemical reactions that aren’t immediately visible.

4. Homemade pH Indicator
A pH indicator is a substance that changes colour depending on the alkalinity or acidity of a solution. This experiment allows children to explore the properties of acids and bases in a fun and visually exciting way, using natural ingredients they may already have in the kitchen, instead of relying on diagnostic reagents from other sources.
How to Do It
To create your own pH indicator, you’ll need:
- Red cabbage
- Water
- A saucepan
- A strainer
- Various household liquids (like vinegar, baking soda solution, lemon juice, and so on)
Start by chopping up the red cabbage and boiling it in water for about 10 minutes until the water turns purple. Strain the cabbage out, keeping the liquid in a bowl.
Now you have your pH indicator solution which can be used to test out many different household liquids. Do this by adding a small amount of each to separate containers of the cabbage juice. Watch as the colour changes, depending on the pH of the liquid.
How It Works
Red cabbage contains a pigment called anthocyanin, which changes colour depending on the pH of the solution it’s added to. In acidic solutions, the liquid will turn red or pink, and in alkaline solutions, it will turn green or yellow.
This is because anthocyanin reacts to the hydroxide ions in bases and the hydrogen ions in acids . This simple experiment gives children a hands-on way to learn about pH levels and how substances react to them.
5. Salt Crystals on a String
This experiment combines art and science to create beautiful salt crystals. It’s an excellent way to teach children about evaporation, crystal formation, and the structure of different substances.
How to Do It
You’ll need:
- Table salt
- Water
- A glass jar
- A piece of string
- A pencil
First, heat up water in a pot and slowly add salt until no more can dissolve. Tie your string to your pencil and place the pencil over the top of the jar to keep it upright. Then, carefully lower the string into the solution, making sure it doesn’t touch the sides of the jar. Over the course of a few days, salt crystals will build up on the string as the water evaporates.
How It Works
This process relies on evaporation. As the water in the jar evaporates, the dissolved salt remains behind as solid crystals on the string. The formation of salt crystals is a great way to show children how molecules can come together to form solid structures. It’s a slow process, so children will need patience, but they will be amazed at how these tiny crystals grow over time.

Why Experiments Matter in Education
Science experiments play a vital role in a child’s education, offering a unique blend of learning and discovery. Rather than simply reading about concepts in books, children get to experience science in action, which makes the material much more engaging.
It’s such an important aspect of scientific learning that several papers have been written about the subject, including one from the European Journal of Education and Pedagogy. This is because, by physically participating in experiments, children can observe first hand how theories and ideas play out in real life, making abstract concepts easier to understand and remember.
These activities also encourage children to develop key skills that go beyond just science knowledge. Problem-solving, critical thinking, and the ability to ask questions are all nurtured through hands-on experimentation.
Kids learn to observe outcomes, consider variables, and make connections between cause and effect, all of which are valuable skills not only in science but in everyday life.
On top of that, science experiments help develop a child’s curiosity and creativity. When children see something unexpected, they are naturally inclined to ask “why” or “how,” sparking a desire to explore and learn more.
Conclusion
Science experiments offer more than just a bit of fun: they’re a powerful tool for learning. When children conduct hands-on experiments, they are actively engaging with the material and can observe the effects of different variables first-hand.
This not only makes abstract concepts more tangible, but also helps to develop their critical thinking, problem-solving, and observational skills.
By doing simple yet educational experiments, children are introduced to the wonders of science in a way that feels more like play than schoolwork. These experiences can spark a lifelong curiosity and interest in how the world works, making them an essential part of any child’s learning journey.